HowTo: Using X Windows remotely on our instances via Windows
This How To will show you how to remotely view and interact with an X windows session on one of our pre-configured Amazon Web Services Machine Images (AMI). We’ll be using a couple of different software packages to accomplish this easily.
To follow this guide you will need to grab SSVNC from their download page:Windows Binaries Only is the one you want to get. Extract that someplace you can find it. In addition to SSVNC, a few other criteria must be met:
- You must have an Amazon Web Services account.
- You must be using one of our (Dowd and Associates) Amazon Machine Images labeled as both non-Windows and “Graphical Remote Capable”
- The AWS Security Group of the instance must allow port 5800 and 5900 through from your IP. More info on that can be found here
- You need to know how to add a PuTTY Private Key (.ppk) file to Pageant
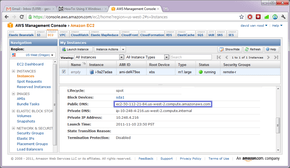
First you’re going to need to know your instance’s Public DNS:

Now you want to go to the unzipped folder for SSVNC that you downloaded earlier, and navigate to the “Windows” folder in there, and run “tsvnc.bat”:

Paste your instance’s Public DNS into the “VNC Terminal Server” box, and add your username (Ubuntu uses “ubuntu” for instance, most AWS instances use “ec2-user”) followed by an “@” sign. For example, ubuntu@ec2-50-112-21-84.us-west-2.compute.amazonaws.com:

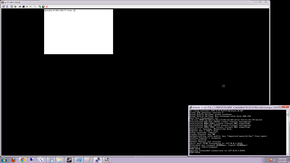
Now, start Pageant and ensure that your Key File has been added to it. Then hit “Connect” on the tsvnc window. You may have to read the terminal window that pops up and see if it asks you to cache the key, just press “y” and press enter. Shortly thereafter, a VNC window will open and this is roughly what your screen should look like:

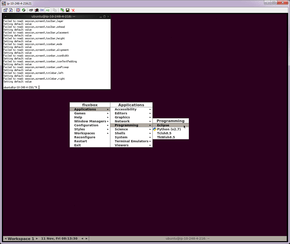
In this circumstance I am using an AMI called “Ubuntu_Java-Dev_Fluxbox_Eclipse_jdk1.6-10112011” (ami-def479ee); so I know the window manager is Fluxbox. So we type fluxbox & into the xterm window (it’s black on white, here) and press enter. You can now right click on the desktop workspace and select programs to run, in this instance we’ll load Eclipse:

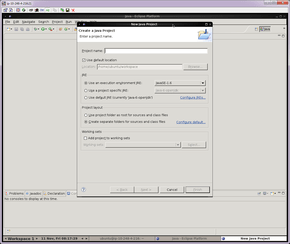
And wait a minute for it to load, in this example, and we now have Eclipse running on our remote computer, but we’re controlling it from the comfort of our homes, coffee shops, or offices:

And that’s all for this HowTo!